Keep your website and email up and running by having correct nameservers on your domain. You can change the nameservers for your domains registered with GoDaddy in your GoDaddy account. There are always at least two nameservers for a domain, and when nameservers are changed, the place where you manage DNS also changes.
Example: If a domain is using default GoDaddy nameservers, the DNS zone file will be in your GoDaddy account. If the domain is using nameservers for a different company, the DNS zone file will be in that company account instead.
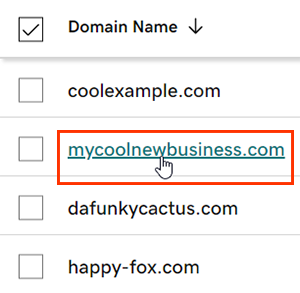
- Sign in to your GoDaddy Domain Portfolio.
- Select an individual domain to access the Domain Settings page.
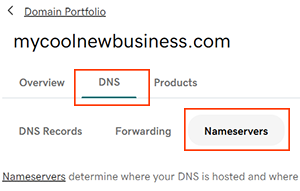
- Select DNS and then select Nameservers.
- Choose the nameserver setting that works best for you:
- GoDaddy Nameservers (recommended): We’ll update your domain to a set of GoDaddy nameservers, and you’ll manage DNS in your GoDaddy account.
- I’ll use my own nameservers: Enter your custom nameservers. Your DNS will be managed elsewhere and not through your GoDaddy account.
- Select Save and then Continue to complete your updates.
- If your domain has Domain Protection, you’ll need to verify your identity. If you’ve had two-step verification (2SV) turned on for at least 24 hours, enter the code we sent via SMS, or enter the code from your authenticator app. Otherwise, enter the one-time password we sent to your registrant email address.
Most DNS updates take effect within an hour, but could take up to 48 hours to update globally.
Our nameservers are:
ns1.stackdns.com
ns2.stackdns.com
ns3.stackdns.com
ns4.stackdns.com
You need to add all 4 nameservers.